You’ve shopped, clicked and searched for the perfect birthday gift, but still have no idea what to buy. Not to worry. Finding a gift even the most hard-to-shop-for friend will love is easy if you get creative. Instead of the usual meaningless gift that is soon after forgotten, creating a unique photo collage will absolutely surprise your friends, grandparents, parents, boyfriend or girlfriend a lot. It's much more personal than buying something from the store, don't you think?
There is no gift more thoughtful than a custom photo collage depicting a lifetime of memories. Just celebrate a special birthday that brings together all these happiest memories in one print. Using your collection of digital files, Picture Collage Maker will work with you to create a personalized keepsake within a few minutes. The following guide will walk you through how to accomplish a stunning collage gift.

Picture Collage Maker Pro provides a number of birthday templates that can help you make a gorgeous greeting card. Select the one you like by double clicking the template to the collage. If you like none of the template, you can even start from scratch and design your own.
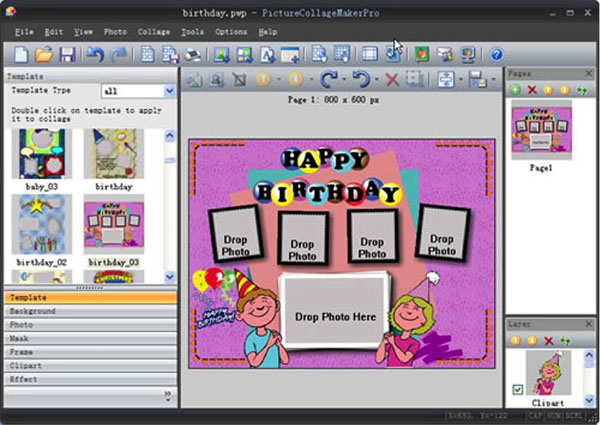
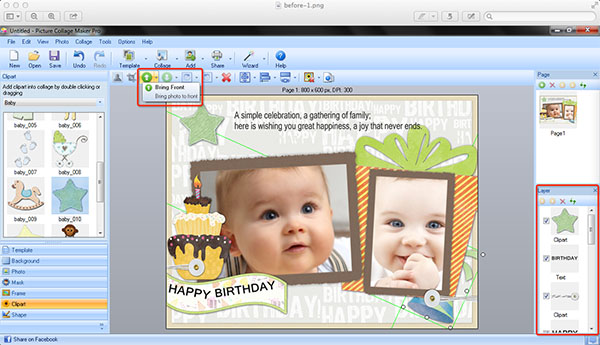
Click Photo button on the left of collage, select the photos you'd like to include in your collage from the local disk, or simply drag and drop photos from the left to the collage. You can resize and rotate the image to find the best position.
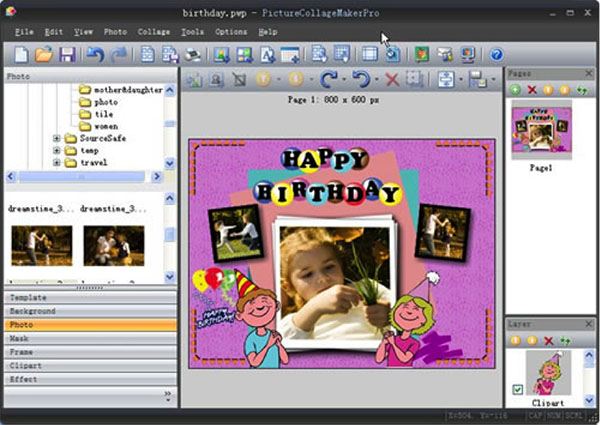
In addition to the recipient’s photo, you can add some nice decorations that will add extra spice to the collage card. It may be an element from the clipart library integrated into the program that go along with the theme, or a message expressing your wishes. You can also change the background, apply frame, mask, etc. to extend your creativity to the most.
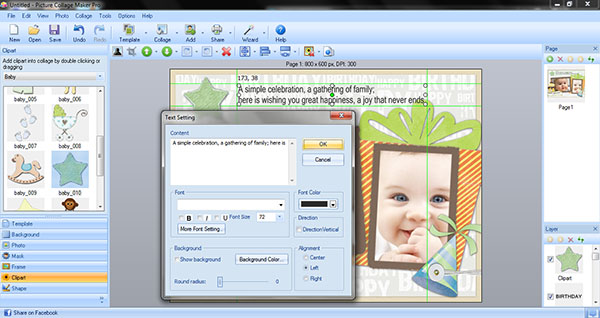
It would be nice to add some personal messages like “Happy Birthday” that reflect your feelings for the recipient and makes him or her feel special. Just click toolbar button "Add"-> "Add Text" to add the words you’d like to say.
You can open Clipart Pane on the left panel to insert some clipart that go along with the theme, which will add extra spice to the collage card.
Open Mask Pane. You can see the list of masks in the left part of Picture Collage Maker window. Select a photo in the edit area. In the Mask Thumbnails Pane, Double click a mask to apply it to the selected photo.
Open Background Pane. You can see the list of background patterns in the left part of Picture Collage Maker window.
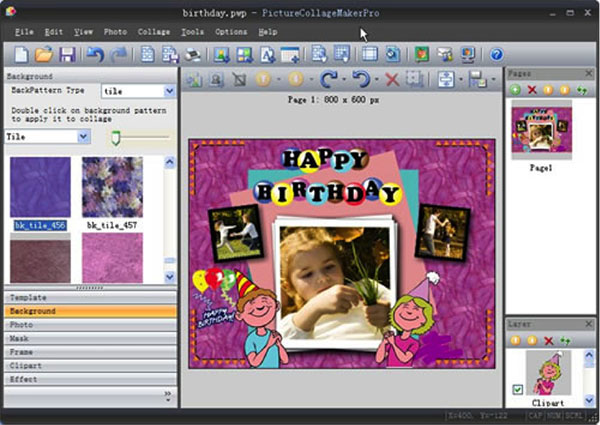
In the Background Thumbnails Pane, Double click a background to apply it to the current collage.
One image can overlap others on a collage page; you choose the order in which to layer the images by moving a selected layer to the back or to the front. You can delete layers you don’t like and replace them with new images.
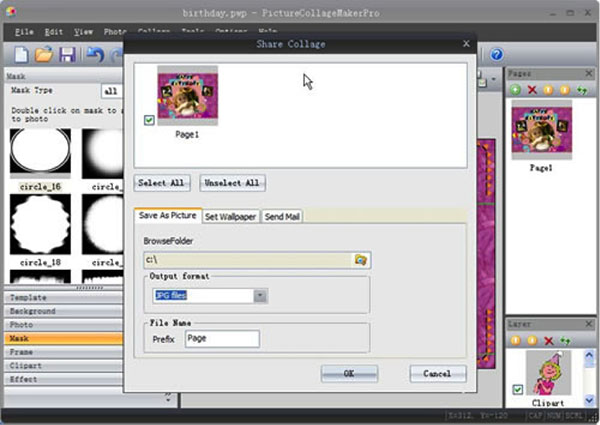
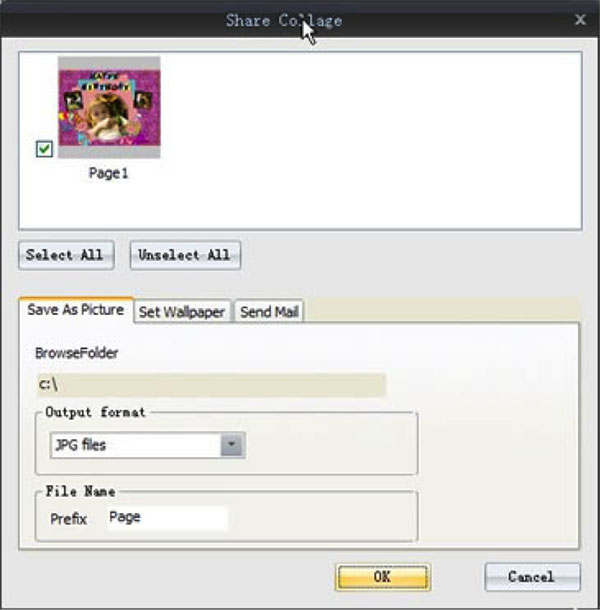
On the File menu, click Save Collage As Picture and specify a folder on your hard disc to save current collage project as an image file. Also, you can directly print it out and present in person.
Just 4 simple steps then you could easily make a birthday photo collage with this photo collage maker. Next you can send the beautiful birthday card to your friends or family, and I believe they will appreciate the tasteful design and the personal touch of the Birthday card, so this will certainly be a gift to remember!
© Copyright PearlMountain. All Rights Reserved.